Cooling the Power Supply:
| Copper has roughly twice the thermal conductivity of aluminum, it can also be
soldered which makes building copper shapes easier then TIG welding aluminum. |
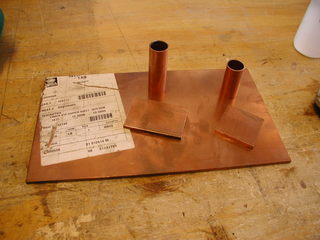 |
I found a great local source for metal, they have all sorts of cut ends as well as regular stock. This 3/16" copper was about $25 ($4.69/lbs). |
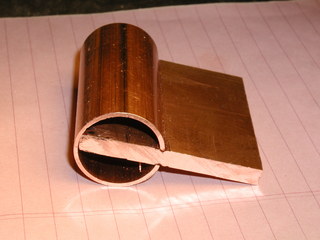
| Here's my first attempt, these pieces were notched and cut with a hacksaw. |
 |
|
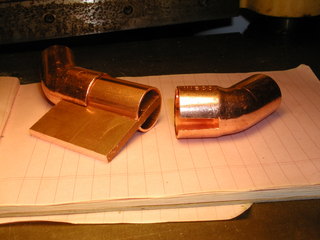
| The next step was to notch the 45 degree street elbow to slide onto the
assembly. |
 |
|
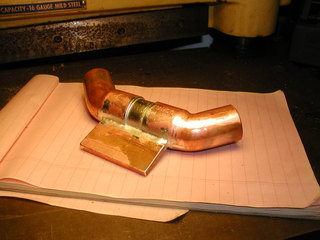
| Here's the whole assembly after soldering. |
 |
|
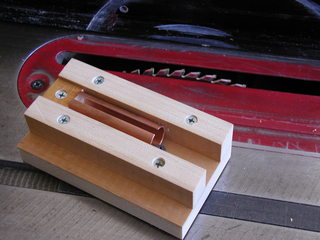
| Cutting and filing the pieces by hand was kind of tedious so I made a jig to hold a
length of pipe securely so I could cut it on the table saw. Note the screw in the
channel securing the right end of the copper pipe. |
 |
|
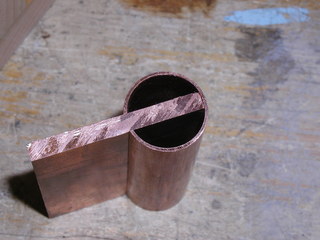
| Here is the water jacket for the second power supply heat sink. You can see
the joints are much cleaner. I also slightly rounded the end of the 3/16" plate
that contacts the inside of the pipe. |
 |
|
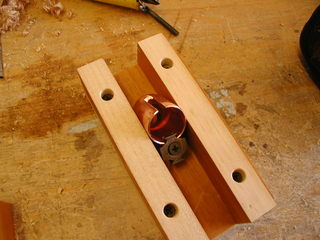
| I also made a jig for notching the street elbows. |
 |
|
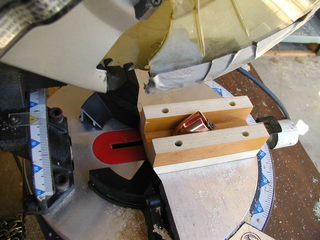
| This jig is meant for use with a miter saw. |
 |
|
| Here is the second PSU water cooled heat sink assembly. |  |
|
| Both sinks ready to install. | 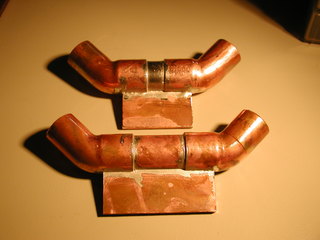 |
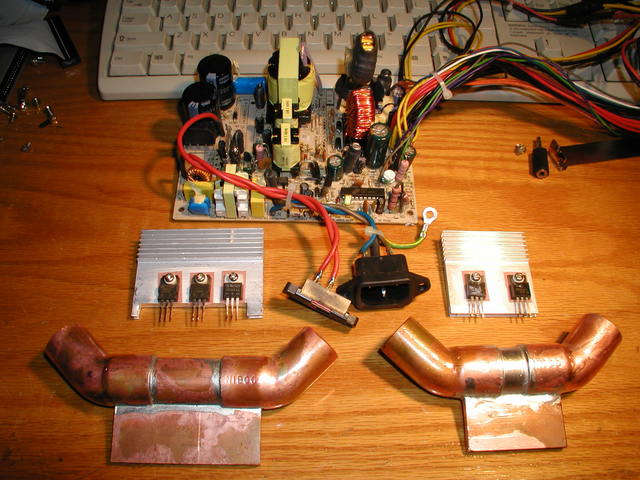
I un-soldered the components from the circuit board and used the old heat sinks as a guide for drilling the new ones. I tried to tap the holes with a 4-40 thread but copper is difficult to work with so I ended up just drilling through holes and using nuts and lock washers. The original PSU used heat sink compound and silicon pads to mount the TO-220 devices so I did the same mounting them to my heat sinks.
| The completed water cooled power supply. Room was pretty tight after mounting the water jacketed heat sinks. Next time I think I will make the 3/16" copper plate about 1/4" taller to help it clear some of the other components | 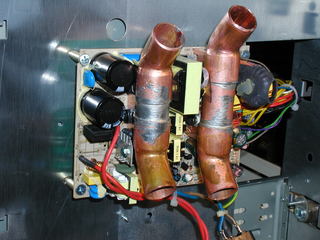 |
|
| Here is the water cooled PSU mounted in the Dell PowerEdge case. |  |
| <-- Previous | Next --> |
