Cooling the CPU:
| I cut the 48" section of Slant/Fin baseboard heater into 3 equal length pieces of a
little over a foot each. I chose a baseboard radiator for my project because the fin spacing is optimized for passive convective flow of air to transfer heat to a room. If the fins were more closely spaced a fan would be needed to adequately remove the heat. |
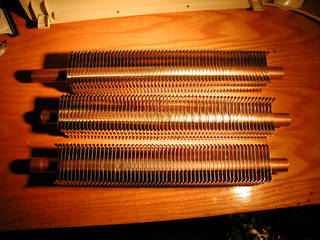 |
Slant/Fin 48" Baseboard Hydronic Radiator, about $28 at
Home Depot. |
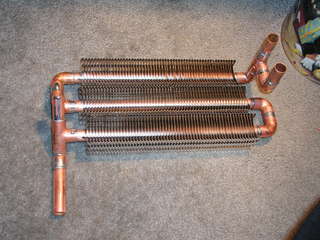
| Here are the sections soldered together. You'll note there are two inlets and
two outlets. One set is for the CPU water block and the other is for the PSU
water jackets. |
 |
|
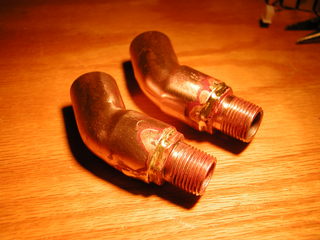
| I brazed the threaded fittings for the water block to a pair of 45 degree street
elbows. |
 |
|
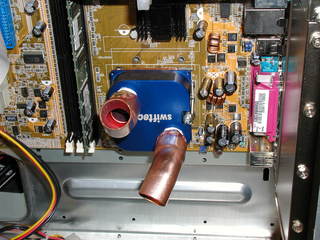
| The water block and fittings mounted to the CPU. Don't do this! attach the
hoses and THEN mount the block to the CPU. When I attached the hoses there was a crunching sound, it was a corner of the CPU die breaking off! Fortunately, the CPU still worked but I had to clean all of the tiny silicon crumbs out and re-apply the Arctic Silver Alumina. |
 |
|
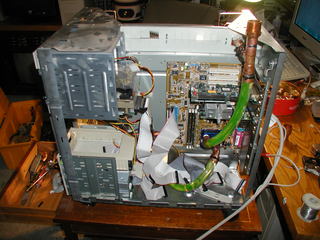
| The heat exchanger mounted in the case and some of the 3/4" vinyl hoses installed.
I used Ty-wraps as hose-clamps. |
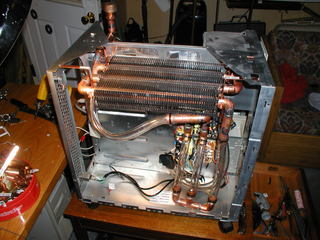 |
3/4" copper pipe hangers - $1.29 each at True Value Hardware |
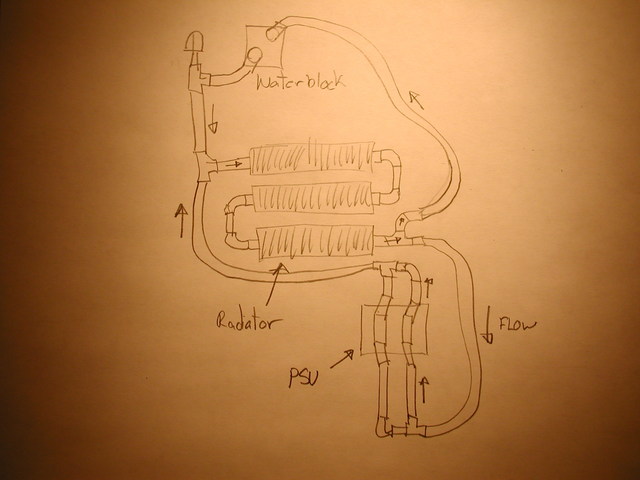 Here's a diagram of the coolant flow, both the PSU and CPU share the same heat exchanger. |
||
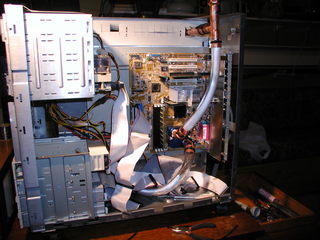
| Hoses installed on the motherboard side of the case. |
 |
|
| I filled the system with a 50/50 mix of automotive anti-freeze and distilled water
as recommended by the CPU water block manufacturer, Swiftech. |
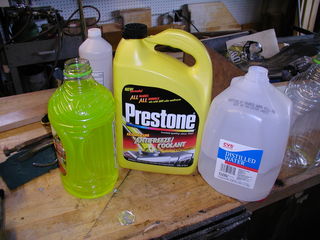 |
Prestone anti-freeze - $12 at True
Value. |
| There is a small space for coolant expansion at the top of the CPU outlet pipe,
this also server as the filler. In operation the level comes up about an inch when the
system is up to temp. |
 |
|
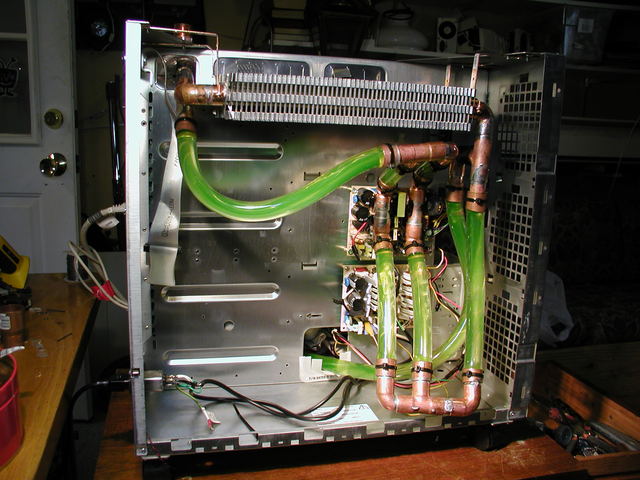
Here is the power supply side. The dip in the tube at the upper right turned out to be a problem. Everything worked fine until I stressed the CPU. The increased flow from the CPU side stalled the flow from the power supply and trapped the hot coolant in this loop. Pulling the tubing up out of the way with a Ty-wrap fixed this problem.
| <-- Previous | Next --> |
